QuaverReady comes with pre-built lessons within the Lessons icon on your Dashboard. But sometimes, you may wish to customize these lessons by adding your own screens or removing pre-built screens.
Customizing QuaverReady Lessons #
To customize an existing QuaverReady lesson:
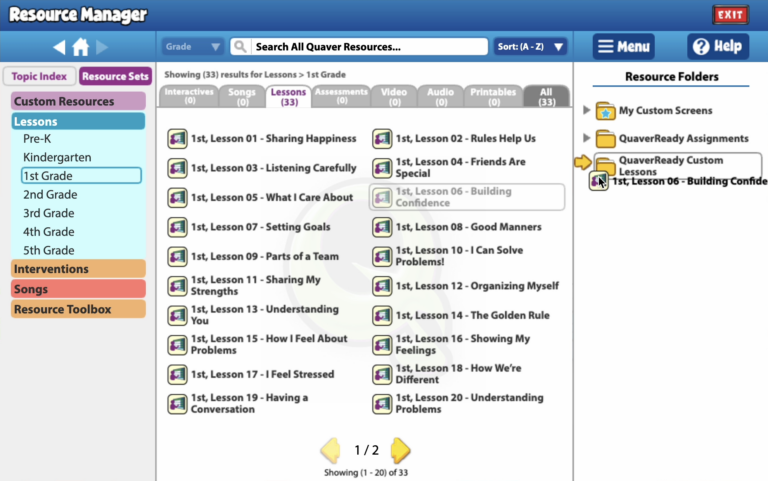
- In Resource Manager, select Resource Sets>Lessons and pick a grade level to select a lesson.
- Drag and drop a lesson from the middle to a Resource Folder in the right-hand section.
- Right-click and select Edit Lesson to re-arrange, add, or remove screens from the lesson.
- You may also right-click and Edit Headers directly from the lesson plan, which includes changing the grade level of the assignment (included in the video tutorial below)
That’s it! You can pick and choose which QuaverReady screens you would like to use. Move them around in any order, and mix and match them with the lessons you build.
Lesson Menu Options #
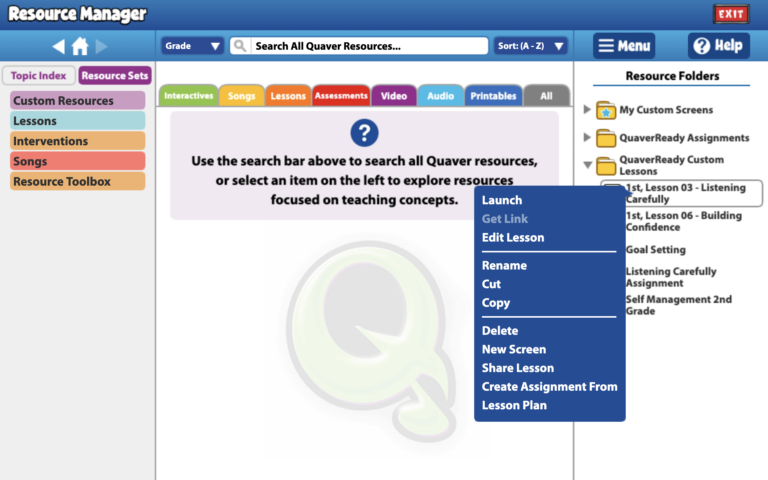
Right-click a lesson OR select a lesson and click MENU to see available options:
- Launch: Opens lesson in Lesson Plan Presenter.
- Edit Lesson: Allows you to edit screens and headers within a lesson.
- Rename: Renames selected item.
- Cut: Cuts selected item to be pasted in another location.
- Copy: Copies selected item to be pasted in another location.
- Delete: Deletes selected item.
- New Screen: Opens Resource Creation to create a new screen.
- Share Lesson: Shares lesson with district colleagues.
- Create Assignment From: Converts lesson into an assignment.
- Lesson Plan: Opens lesson plan for selected lesson.
Creating Lessons #
You can create a lesson by combining existing QuaverReady screens or custom screens you’ve made in Resource Creation.
To create a new lesson:
- Search for a resource or drag screens from your My Custom Screens folder.
- Drag the resource into a folder on the right side of the screen.
- Select the folder and hit MENU and NEW LESSON.
- Name your lesson.
- From there, you can continue adding any screens you would like in your custom lesson.
Sharing Lessons (with district colleagues) #
Once you have created a customized lesson, you can share it with other teachers in your district.
To share a lesson with district colleagues:
- Select a lesson within a folder in Resource Manager.
- Click Menu or right-click and select Share Lesson.
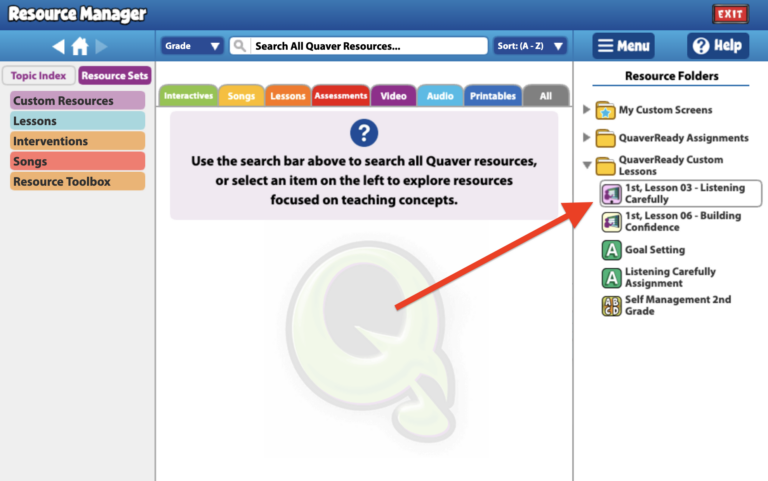
- You will see the option change to Shared, and the lesson icon will change colors (as seen in the image below) to indicate it is shared with others in your district.
- To unshare content: Select the lesson again, click Menu and Shared, and the content will be unshared.
Additional Tips for Sharing Lessons: #
- Once shared, colleagues can find your lessons by searching your name, the lesson title in Resource Manager, or Custom Resources in the Resource Sets tab.
- Drag and drop shared lessons into your folders, creating a copy you can customize and use further.