Overview #
From your QuaverEd Music Integration Dashboard select the Music Integration Lessons icon.

Curriculum Menu #
Once you open the lessons section, you’ll see:
- Curriculum Features & Best Practices
- Grade Level Menu
- Link to Teacher Toolbox
- 6 Modules
Use the purple arrow to view more Modules

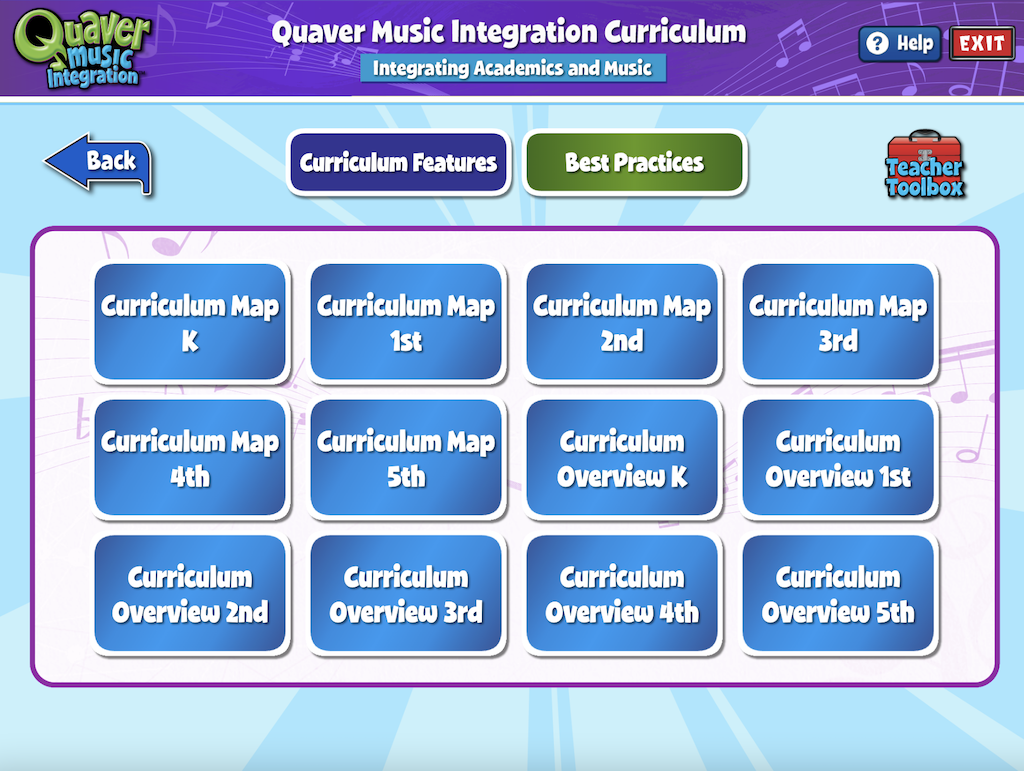
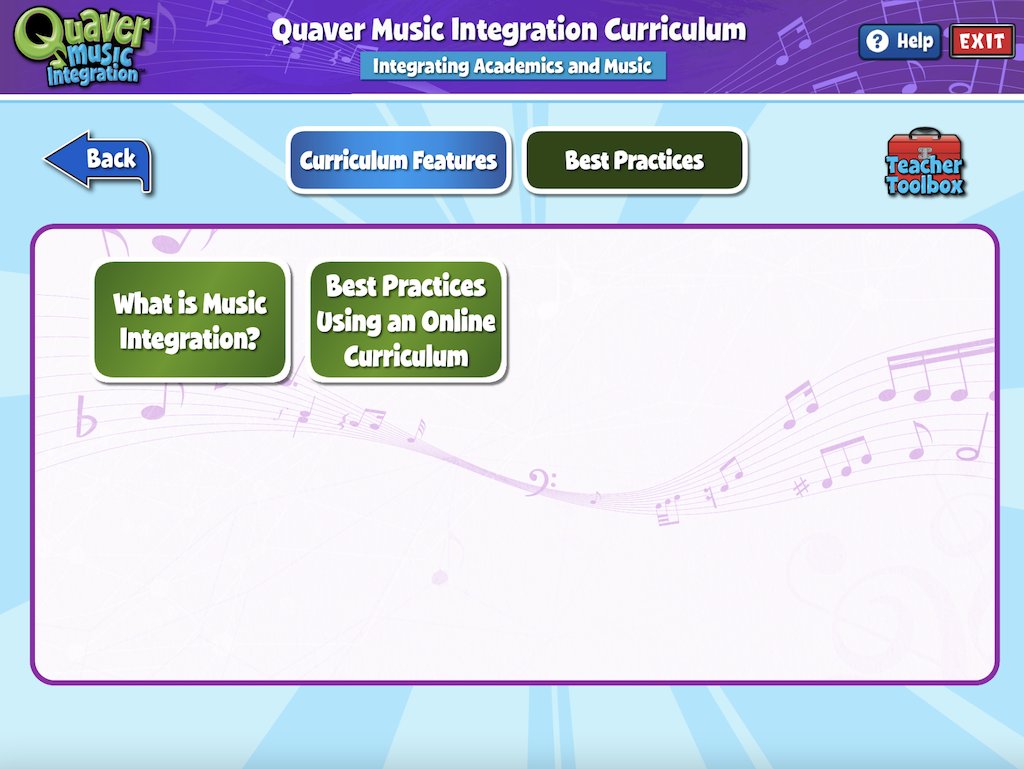
Curriculum Features and Best Practices #
The Curriculum Features and Best Practices button will guide you through the specific features of the QuaverMIC curriculum as well as best practices to support instruction. Here you will find Curriculum Maps and Curriculum Overviews.
Once a Module is open, you’ll see:
- Integration Content Area
- Grade Level & Musical Concept
- Theme
- 3 Lessons
Each of the Lessons is numbered and contains the lesson’s title, as well as the Featured Song, found in the lesson.
Each Featured Song is used throughout the three lessons as the vehicle for teaching cross-curricular content. Through the power of music, students are able to make deeper connections to the lessons which can lead to greater retention long-term.

Lesson Summary Screen #
On the Lesson Summary Screen, you’ll see an overview of each activity in the lesson, along with useful information for planning. The buttons at the bottom of the screen access:
- Overview – The purpose of the lesson
- Objectives – The student goals for the lesson
- Lesson Plan – A PDF version of the full lesson, which can be saved or printed
- Worksheets – Any lyrics sheets or activity printables related to the lesson

The Lesson Summary Screen defaults to the Icon View of the lesson Each activity is represented by a thumbnail preview of the interactive resource.
Click the list option to toggle to a List View with each activity listed by name with a corresponding icon representing the screen type. Toggle back to Icon View as needed.
To launch a lesson, click the green Launch button.

Lesson Content #
Each lesson contains a variety of interactive screens, songs, and connections for students to make across the curricular areas.
Each lesson will conclude with a “What Did We Learn Today?” screen where you can review the lesson objectives following instructions.

Lesson Navigation Bar #
To move between screens, click on the previous and next buttons. If you’d like to jump between screens quickly, click on the title bar at the bottom and select the screen you want.
The exit button at the bottom right takes you back to the lesson summary.

Screen Order Editor #
All screens in the lesson are displayed when clicking the title bar. You have the ability to temporarily rearrange the order of screens in a lesson. Click the purple edit icon in the top right corner.
After clicking the edit icon, select a screen and use the yellow arrows to adjust its position. (shown below) Alternatively, you can drag and drop screens to reorder them. Click ‘OK’ when the screens are in your desired order.
Please note that these changes are temporary; once you close the Lesson Presenter window, the screens will return to their original order.

Lesson Menu #
Every lesson screen features a Settings and a Create menu. You can access these menus from the curriculum, Resource Manager, or specific toolboxes like the Teacher Toolbox, and you’ll encounter them in various areas of the curriculum.
At the top of each menu, you’ll notice yellow arrows. Clicking either arrow will simultaneously hide both the Settings and Create menus, as shown in the bottom left image. Clicking the yellow arrow on either side will reopen both menus, as illustrated in the bottom right image.
Closed Menu

Open Menu

Important: The menus automatically adjust to your device’s screen size, appearing on each side of your window or merging into a single menu as needed. For example, a tablet may consolidate the menus, while an interactive whiteboard may display them separately. Both versions are shown below.
You can merge the menus using your browser’s built-in zoom feature. Zooming in will combine them at the bottom of the screen, while zooming out will separate the menus to each side again, depending on your device/browser capabilities.
Separated Menus
Consolidated Menu

Settings Menu #
Use the dropdowns below for an in-depth look at each tool.

The Full Screen button maximizes the screen, hiding the browser tabs and address bar, leaving only the QuaverEd content visible.
Press esc. button to exit Full Screen.


The Español button seamlessly converts the lesson into Spanish. When a lesson is converted to Spanish, the button will read in English, allowing you to easily switch back to English version when needed.


The Plan button opens the Lesson Plan in a separate tab. The Lesson Plan is a PDF version of the full lesson, which can be downloaded or printed. It includes the purpose, objectives, and standards. Additionally, the lesson plan provides notes for each screen.


Each screen in a lesson includes Notes describing the screen’s purpose and objectives. These notes are also available in the lesson plan.


Worksheets display printable lyrics, assessments, and manipulatives if applicable. Click the Worksheet title you’d like and select ‘Open.’ All Worksheets open as PDFs, which can be downloaded or printed.


The Favorite tool allows you to mark any screen or the entire lesson as a favorite. Your favorites will appear as part of the Resource Sets > My Favorites on the left side of Resource Manager.


QR Code shows a QR code or a copyable resource link to share with colleagues or students. These links are specific to individual screens and not for the entire lesson.


When clicking the Hide option, use the four arrows on the screen to drag and reveal certain areas of the lesson screen.


Use the Grade tool to temporarily change or remove the lesson’s grade level shown on the lesson welcome screen, along with the age of the characters. This can be useful when teaching the same lesson to multiple grade levels.


When editing a lesson in the Resource Manager, you can add an instructional video to any screen and upload an MP4 or MOV file under 300 MB and 5 minutes. The Video button will be grayed out until a video is added to the screen.

Create Menu #

The Draw tool allows you to draw anywhere on the screen, along with formatting options. Additionally, you can switch to a blank screen.
Draw Tool Features

- Cursor: toggles the Draw tool on and off. Toggle this off if you’d like to navigate the lesson while keeping the Draw palette at the bottom of the screen.
- Color: provides various color options.
- Size: adjusts the size of both the draw tool and the eraser tool.
- Eraser: changes your cursor into an eraser. Click the Eraser icon again to revert back to the cursor.
- Undo Last: reverts your last action.
- Clear All: removes all drawings made on the screen. You must click Save to keep your changes.
- Save: preserves all drawings and text in their current state. When returning to this screen, click the draw or text buttons to view your saved content.
- Blank Screen Toggle: turns the entire browser screen white, providing a free space to type or draw.

The Text tool allows you to add text anywhere on the screen, along with formatting options. Additionally, you can switch to a blank screen.
Text Tool Features

- Cursor: toggles the Text tool on and off, allowing navigation while keeping the text tool at the bottom of the screen.
- Style: provides options for different typography styles such as Header, Bold, and Regular text.
- Color: provides various color options.
- Size: adjusts the font size.
- Border: toggles a border around your text box on and off.
- Remove: reverts your last action.
- Clear All: removes all text boxes on the screen. Remember to click Save to preserve your changes.
- Save: preserves all drawings and text in their current state. When returning to this screen, click the draw or text buttons to view your saved content.
- Blank Screen Toggle: turns the entire browser screen white while keeping the draw tool menu visible, providing a free space to type, draw, or use widgets.

Widgets are a set of on-demand tools such as a keyboard, metronome, soundboard, timer, D20 dice, and scoreboard. All widget windows can be dragged anywhere on the screen, allowing multiple widgets to be open simultaneously. Additionally, you have the option to switch to a blank screen.
Widget Tools

Keyboard functions as an interactive keyboard. Adjust its sound by utilizing the sound dropdown. Access more octaves through the gear icon.
A Metronome is a tool used in music to maintain a steady tempo or beat. Adjust the tempo using the yellow arrows, ranging from 40 bpm to 200 bpm. Modify the metronome’s sound by pressing the sound button.
The Timer can be used to measure or count down a specific amount of time. Simply click the numbers and use your keyboard to enter your desired time, then initiate the timer by pressing Start.
The ‘Count Down’ toggle adds your set time next to the countdown, while the ‘Alarm’ toggle will alert you upon the timer’s completion. Reset restores the time to the initially entered value, with the maximum time allowed being 60 minutes.

The Soundboard comprises four buttons featuring different sound effects suitable for classroom use.

D20 Dice lets you roll a 20-sided die by clicking the dice. To hear the die roll activate the ‘Audio’ toggle.
Use the Scoreboard as a tool to keep track of scores in games or activities. Access Scoreboard Options by clicking on Menu > Options. Here, you can customize various settings such as time limits, score increments, the winning score threshold, sound effects, and the number of teams participating.