Use the Assignments tool to manage and assign assignments, also known as Assignment Templates, for your classes. There are two types of assignments: graded and ungraded. Graded assignments are meant to be evaluated, while ungraded assignments serve as supplemental materials for students to read, watch, or interact with without being graded. When creating assignments, consider these options:
- Creating Assignments
- Distributing Assignments
- Editing Assignments
Creating Assignments #
You have 2 options when it comes to assignments. You can convert an existing lesson into an assignment or you can create an assignment from scratch.
- Convert a Lesson into an Assignment
Right-click any lesson or screen within the Resource Folders section of Resource Manager and click “Create Assignment From”. You will be asked to name the assignment and it will show up in your folder with a teal “A” for “Assignment”. From here you can edit it, share it with your class, or assign it to your class. - Create an Assignment from Scratch
In Resource Manager, drag screens and lessons from the search area to one of your folders. You can also use the Resource Creation tools to create custom screens. Remember, Resource Creation screens you’ve created will automatically show up in Resource Manager’s “My Custom Screens” folder. You can click and drag these to other folders if desired. Once all resources have been added to a folder, select the folder and right-click or click Menu > Create Assignment Template. Name your new assignment and a green “A” will appear next to it.

Distributing Assignments #
To distribute an assignment, select an assignment and click Give Assignment.
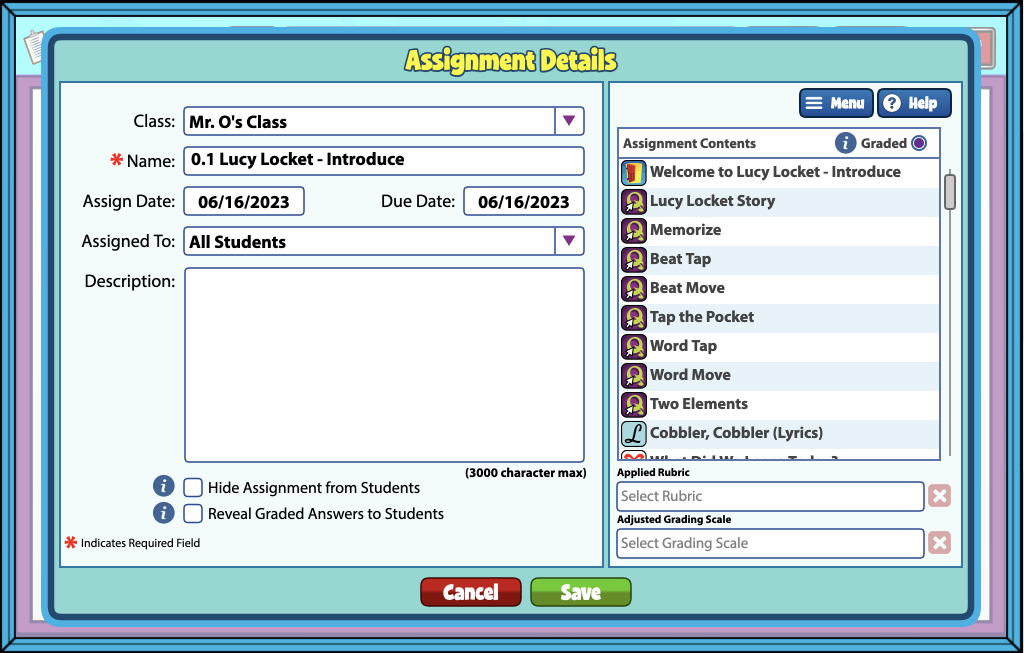
An Assignment Details screen will appear. Here, you can:
- Assign to one or more classes
- Edit Assignment Name
- Edit Assign Date and Due Date
- Assign to one or more students
- Edit Assignment Description
- Hide Assignments from Students
- Reveal Graded Answers to Students
- View Assignment Contents
- Select Rubric and Grading Scale
If the Assignment Template contains gradable screens, a bubble will be displayed next to the screen title. Select the bubble to make the screen graded.
Click Save to assign to your class. Your assignment will now appear on the right side of your screen, showing the assignment has been given.
Setting the Grading Scale
Quaver teachers can adjust the grading scale for each assignment in the Assignment Details window.
To adjust the grading scale:
- Click GIVE ASSIGNMENT to open the Assignment Details window.
- In the bottom right corner, click ADJUSTED GRADING SCALE.
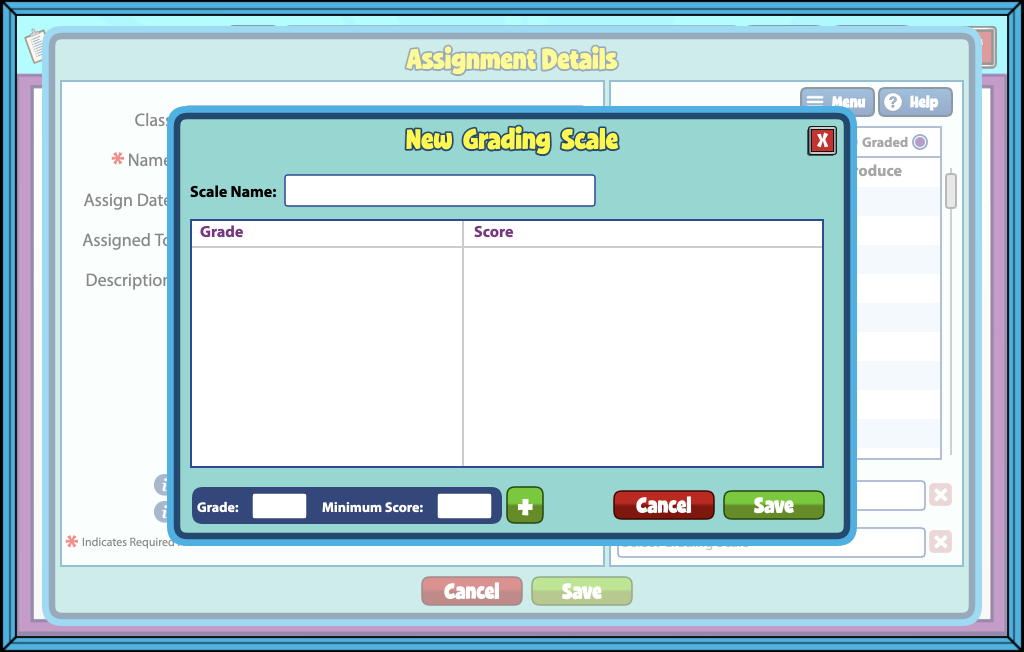
- Here, you can choose a previously created grading scale template or click +ADD NEW to create a new one.
- Adjust the grading scale for this assignment by entering each grade letter and the minimum score that should earn that grade. For example, an activity with a possible 16 points might have a minimum score of 13 earn an A, 10 earn a B, 7 earn a C, and so on.
- Enter each rule one by one and click SAVE.
- Back on the menu, select the grading scale you wish to use and click SAVE.
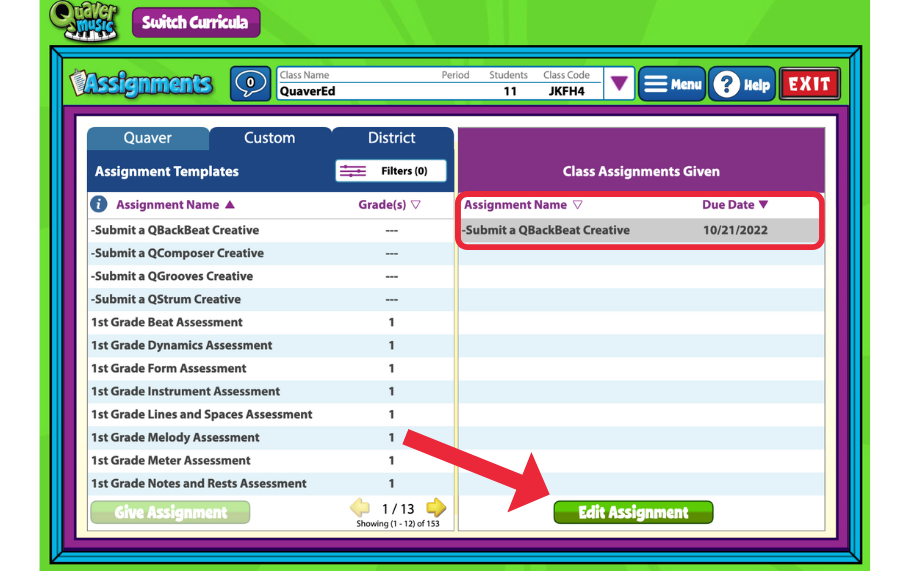
Editing Assignments #
Assignments can be edited and reassigned after distributing them to students. Assignments are saved as Assignment Templates for total customization. Select the “Edit Assignment” button in Student Admin>Assignments or in the Resource Manager right-click and select “Edit Assignment.”
Please note that additional content can be easily added or removed as needed. However, it’s important to keep in mind that if you make any changes to the assigned content, students will need to be reassigned in order to view the edited content.